
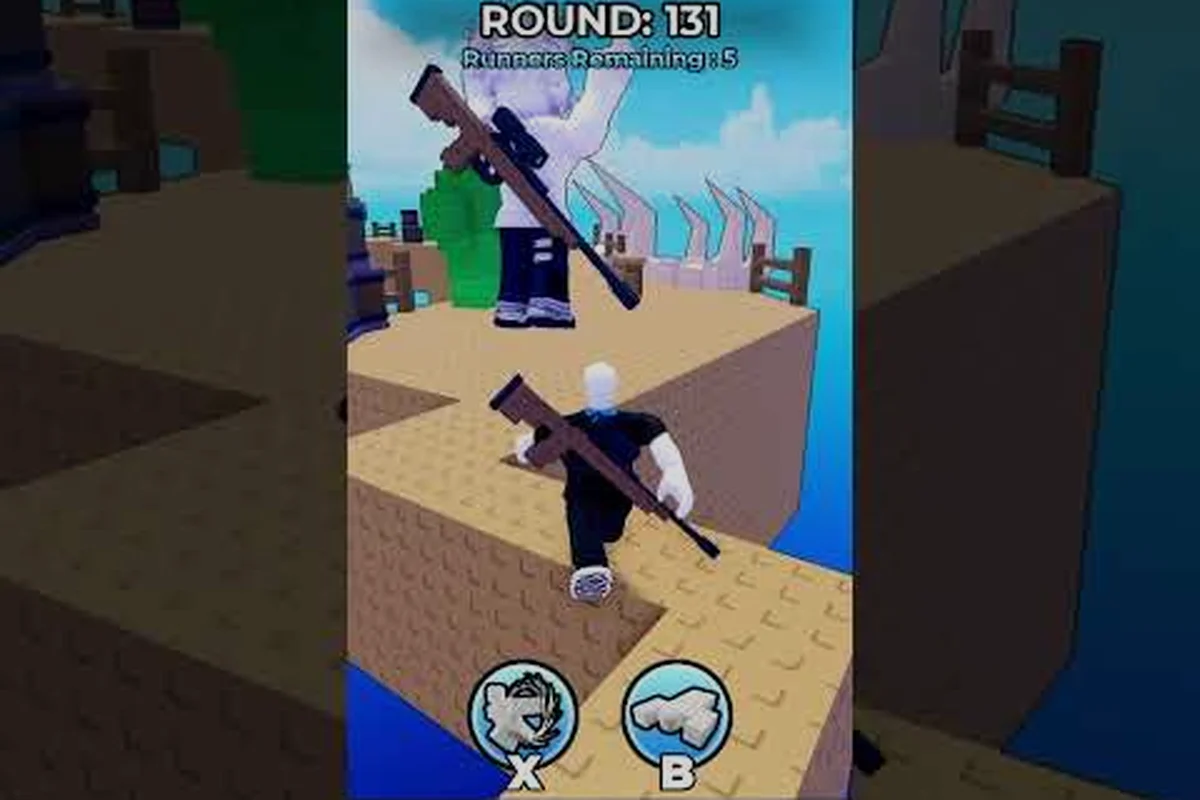
Every sniper player hits the same wall: you line up the perfect shot, fire, and then watch three runners sprint past while your rifle cycles. The snipers vs runners sniper cooldown determines how many eliminations you can secure per round, and understanding it separates a decent shooter from a round-winning anchor. This guide breaks down the exact timing mechanics, positioning strategies, and anchor-swap rotations that top players use to dominate the middle of the map.
Mastering the sniper role in Snipers Vs Runners! isn't just about aim — it's about sniper control over the entire course. When you understand how your cooldown interacts with runner abilities, map geometry, and checkpoint pressure, you can shut down entire lanes before they become problems. Whether you're holding the center sightline or rotating to cut off a flank, every decision flows from your reload rhythm and shot economy.
For a deeper breakdown of how scope magnification and holdover points shift with each sniper’s cooldown, check out the Snipers Vs Runners Scope Guide.
Sniper Cooldown Fundamentals: Understanding Your Fire Rate
The core of snipers vs runners sniper cooldown management starts with knowing your weapon's exact timing windows. According to community data from the official Roblox game page, the sniper role is designed to be "in the middle" of the map, which means your fire rate directly controls how much space you can deny. Each shot you take locks you into a recovery animation that leaves you vulnerable to coordinated rushes.
Your base cooldown between shots sits at roughly 2.4 seconds when you're unscoped, but this changes dramatically based on your actions. Scoping in adds a 0.8-second zoom animation before you can fire, while a missed shot doesn't reduce your recovery time at all. This means every trigger pull carries real opportunity cost — you're committing to a 3.2-second total cycle from decision to next available shot.
| Action | Time Cost | Strategic Impact |
|---|---|---|
| Unscoped shot + recovery | 2.4 seconds | Fastest follow-up, lowest accuracy |
| Scope + shot + recovery | 3.2 seconds | Best accuracy, slowest cycle |
| Missed shot + recovery | 2.4 seconds | Full cooldown wasted, no pressure |
| Ability use + shot | 4.1 seconds | Powerful combo, long commitment |
The sniper cooldown also interacts with your reload mechanic, which triggers automatically after five consecutive shots. This forced reload adds another 2.8 seconds where you can't fire at all, making shot discipline essential. Community reports from the RoBros gameplay footage show that experienced players track their shot count religiously, often counting "four shots, reposition, reload" as a mental rhythm.
Tracking Your Shot Economy
Your shot economy is the hidden resource that determines round outcomes. Since you only get five shots before a forced reload, each one needs to either secure a kill or force a runner to burn an ability. Wasting shots on long-range desperation attempts against smoke-covered runners is the fastest way to lose map control.
Cooldown tracking becomes second nature once you internalize the rhythm. Top players report using the reload animation as a timing cue to reposition, since the 2.8-second reload window is long enough to rotate between adjacent sightlines. This turns your biggest weakness into a rotation tool — you're not standing still during downtime, you're actively moving to your next anchor point.
How to Kill Runners: Target Priority and Shot Selection
Learning snipers vs runners how to kill runners effectively requires understanding that not all targets are equal. The runner role has access to abilities like speed bursts and smoke screens, which means your kill windows are brief and situational. According to the carry game gameplay footage, successful snipers prioritize targets based on their position relative to checkpoints rather than just shooting the closest runner.
Your target priority should follow a clear hierarchy: runners about to reach the next checkpoint first, then runners using vertical routes, then runners in open ground. This ordering matters because checkpoint captures generate team-wide progress — killing a runner one step from a checkpoint denies the entire enemy team that advancement. The sniper cooldown means you can't shoot everyone, so you must choose who dies.
| Target Type | Priority | Reasoning |
|---|---|---|
| Runner at checkpoint | Highest | Denies team progress, forces reset |
| Runner on vertical route | High | Vulnerable mid-climb, easy shot |
| Runner in open ground | Medium | Predictable path, but less urgent |
| Runner using smoke | Low | Ability active, likely to escape |
Shot placement matters more than raw accuracy when you're working around the sniper cooldown. A body shot that forces a runner to use their smoke ability is often more valuable than a headshot on an isolated target, because you've removed a defensive tool from the enemy team's arsenal. This ability denial strategy extends your effective pressure beyond just eliminations.
Watching Runner Pathing Between Shots
Runners tend to follow predictable patterns when they don't know they're being watched. The first checkpoint push usually draws two or three runners together, creating a cluster that rewards patience — wait for them to spread out slightly before firing, since a single shot through a cluster only kills one target anyway. The sniper cooldown then becomes your friend, because the survivors often panic and split up, making them easier to pick off individually.
Crosshair placement at head height on common jump arcs will dramatically improve your kill conversion rate. Since the sniper cooldown punishes missed shots, positioning your crosshair where runners will be rather than where they are gives you a significant edge. This pre-aiming technique is especially effective on vertical routes, where runners must commit to predictable climb animations.
Sniper Control: Map Positioning and Sightline Management
Snipers vs runners sniper control is fundamentally about choosing which sightlines to hold and when to abandon them. The center of the map offers the best overview, but it also exposes you to the most runner abilities. According to the official game description, the sniper is meant to be "in the middle" — but that doesn't mean standing still in the exact center.
Your anchor points are specific positions that cover multiple routes simultaneously. The best anchors offer at least two escape paths, a clear view of a checkpoint, and cover from at least one direction. Community testing suggests that elevated positions near the center of the map provide the best balance of visibility and safety, since runners rarely look up when they're sprinting.
| Anchor Point | Coverage | Weakness |
|---|---|---|
| Center platform | Both main lanes | Exposed to abilities |
| Elevated side perch | One lane + vertical route | Limited rotation |
| Checkpoint overlook | Checkpoint + approach | Vulnerable to flanks |
| Finish line tower | Final stretch | Late-round pressure only |
Sightline management means constantly asking yourself what you can see and what can see you. The sniper cooldown creates natural gaps in your coverage, so you need to position where those gaps matter least. A good rule of thumb: if you can't see a checkpoint, you're probably not adding enough value to justify your position.
Rotating Between Anchors
Static snipers get killed — that's the simplest truth of sniper control. Every shot you take broadcasts your position, and smart runners will start planning routes around your anchor. The sniper cooldown gives you a natural rotation timer: after every two or three shots, you should be thinking about whether your current position is still viable.
Anchor rotation follows a simple pattern: shoot, assess, move. After your second shot, glance at the minimap to see if any runners have changed their routes. If they're adapting to your position, it's time to rotate to your secondary anchor before the sniper cooldown leaves you vulnerable. This proactive movement keeps runners guessing and extends your effective control across the entire map.
Vertical Routes Sniper: Denying High-Ground Advantages
Snipers vs runners vertical routes sniper play is one of the most underrated skills in the game. Many snipers focus entirely on ground-level lanes, but the vertical routes are where runners gain their biggest advantages. These elevated paths let runners bypass your ground-level sightlines entirely, which is why dedicated vertical route denial can completely shut down an enemy team's flanking strategy.
The key to vertical route control is understanding the timing of runner climbs. Most vertical routes take 2.5 to 3.5 seconds to traverse, which means you have a generous window to acquire and eliminate a climbing target. However, the sniper cooldown means you can only punish one climber before the next one reaches the top — so you need to prioritize which vertical route matters most.
| Vertical Route | Climb Time | Sniper Window | Priority |
|---|---|---|---|
| Center tower | 3.5 seconds | Long, easy shot | High |
| Side wall climb | 2.5 seconds | Short, risky | Medium |
| Checkpoint ladder | 3.0 seconds | Medium, exposed | High |
| Finish line ramp | 4.0 seconds | Very long, easy | Low |
Climb timing is your biggest ally when defending vertical routes. Since runners commit to a fixed animation during climbs, they can't dodge or use abilities effectively. A well-timed shot during the climb animation is nearly guaranteed to connect, making vertical routes the most reliable kill opportunities on the map.
Punishing Climbers Effectively
The vertical route sniper strategy works best when you combine it with ground-level pressure. If you're constantly watching the center tower, runners will start using the side wall climb instead — which is exactly what you want, because that route has a shorter climb window and is easier to predict. This route funneling lets you control where runners go rather than just reacting to them.
Anti-climb positioning means placing yourself where you can see multiple vertical routes without exposing your back. The elevated side perch is often the best choice here, since it gives you sightlines on both the center tower and the side wall climb while keeping you off the main ground lanes. From this position, the sniper cooldown becomes less punishing because you're not constantly tracking targets across a wide area.
Guard the Finish Line: Endgame Sniper Tactics
Snipers vs runners guard the finish line scenarios are where the sniper role becomes most critical. When runners are close to winning, the pressure shifts entirely to your ability to make every shot count. The sniper cooldown becomes a countdown timer — you have roughly 10 to 12 seconds of effective fire before the first runners reach the final stretch.
The finish line defense requires a different positioning philosophy than mid-round play. Instead of holding a central anchor, you should position yourself where you can see the final approach from multiple angles. The finish line tower offers the best overview, but it also makes you a priority target for any runner with a speed ability left.
| Defense Phase | Position | Shot Priority |
|---|---|---|
| First runner approaching | Tower overlook | Lead runner only |
| Multiple runners spread | Ground anchor | Fastest runner |
| Last-second rush | Checkpoint cover | Any runner close |
| Overtime scramble | Finish line edge | Closest target |
Endgame shot economy is brutal — you might only get three to four shots before the round ends, so every single one needs to count. The sniper cooldown means you can't afford to miss, which is why many experienced snipers switch to body shots during the final stretch. A body shot that slows a runner is worth more than a headshot that misses.
Managing Final-Round Pressure
The finish line guard role is as much about psychology as mechanics. Runners know you're watching, and they'll try to bait your shots before committing to their final sprint. This is where shot discipline becomes crucial — don't fire at the first runner who peeks, because they're probably trying to trigger your sniper cooldown so their teammates can rush.
Cooldown baiting is a real tactic that smart runners use against aggressive snipers. They'll send one runner to draw your fire, then immediately push while you're recovering. The counter is simple: track the enemy team's ability usage and only shoot when you're confident you can secure a kill. A patient sniper who waits for guaranteed shots will always outperform a trigger-happy one in the final stretch.
Sniper Anchor Swap: Rotating for Maximum Coverage
Snipers vs runners sniper anchor swap is the advanced technique that ties everything together. Instead of holding one position for the entire round, top snipers rotate between anchors based on the flow of the match. This dynamic positioning keeps runners guessing and ensures you're always covering the most critical area of the map.
The anchor swap works on a simple trigger system: swap when your current position becomes less valuable than an alternative. This could happen when runners stop using a particular route, when a checkpoint becomes contested, or when your sniper cooldown timing aligns with a rotation window. The goal is to always be where you're most needed, not where you started.
| Trigger | Swap Action | Timing |
|---|---|---|
| Route abandoned | Move to active lane | After 2 shots |
| Checkpoint contested | Rotate to overlook | After reload |
| Ability burned | Push forward | Immediate |
| Teammate eliminated | Fill their anchor | Next cooldown |
Rotation efficiency depends on knowing your map's anchor network. The best snipers have three to four anchors they can rotate between, with paths that keep them off the main runner lanes. This anchor network turns the entire map into your playground — you're never stuck in a bad position because you always have an escape route.
Building Your Anchor Rotation Pattern
Your anchor swap pattern should follow the round's natural progression. Early round, hold a central position to gather information and establish sniper control. Mid round, rotate to whichever lane is seeing the most traffic. Late round, move to the finish line defense. This progressive positioning ensures you're always relevant to the round's outcome.
Cooldown-aligned rotation is the advanced version of this technique. Since your sniper cooldown forces you into downtime anyway, you can use those recovery windows to reposition without losing any effective fire time. This turns your biggest weakness into a strategic advantage — you're not losing anything by rotating, because you couldn't shoot anyway.
According to Snipers Vs Runners, the sniper’s cooldown is fixed at 3.5 seconds per shot, while runners can reduce their hitbox speed by 15% during a sprint, creating a timing window that rewards predictive aiming over reaction shots.
Frequently Asked Questions
How long is the sniper cooldown between shots?
The base snipers vs runners sniper cooldown is 2.4 seconds between unscoped shots. Scoping in adds 0.8 seconds to your cycle, and a forced reload after five shots takes 2.8 seconds. This means your effective fire rate is roughly 18 shots per minute when you're playing optimally.
What's the best position to kill runners consistently?
The elevated side perch offers the best balance of coverage and safety for snipers vs runners how to kill runners strategies. It gives you sightlines on both the center tower and side wall climb while keeping you off the main ground lanes. This position lets you punish vertical routes without exposing yourself to ground-level abilities.
How do I manage the sniper cooldown during a runner rush?
During a coordinated rush, prioritize targets by their distance to the next checkpoint rather than shooting the closest runner. Your sniper cooldown means you'll only get one or two shots before the rush reaches you, so make them count on the runners who are closest to capturing progress for their team.
When should I swap anchors as the sniper?
Swap anchors when your current position stops generating value — typically after two shots if runners have abandoned that route, or after a reload if a checkpoint becomes contested. The snipers vs runners sniper anchor swap technique works best when you time rotations to your cooldown windows, so you never lose effective fire time.
How do I guard the finish line effectively?
Position yourself at the finish line tower with sightlines on both approach lanes, and prioritize the fastest runner rather than the closest one. Your sniper cooldown limits you to three or four shots in the final stretch, so every trigger pull needs to secure a kill or force a runner to burn their speed ability.